A Single Player, Third Person, Hack and Slash, Arcade, Action-Adventure Game Experience
Fall into the lunacy of the Deep Sleep state with Erik and fight infinite rounds of enemies in a unique Hack and Slash combat system
.......Until you wake up again.......
Release date: September 2027 on Steam
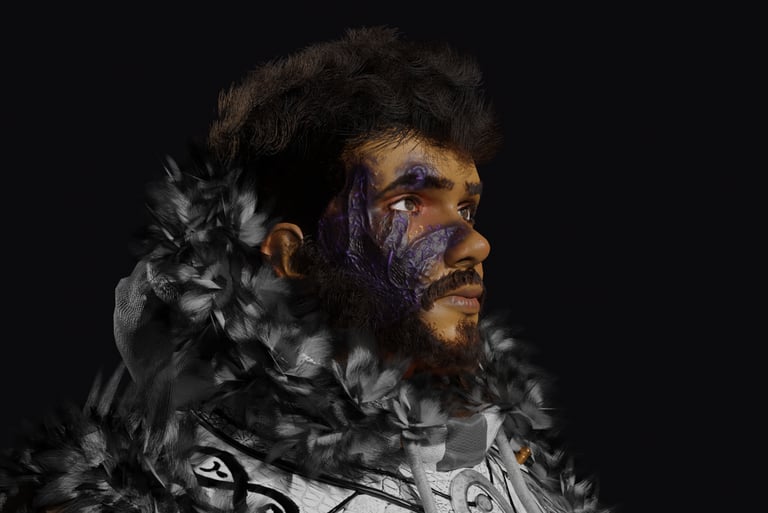
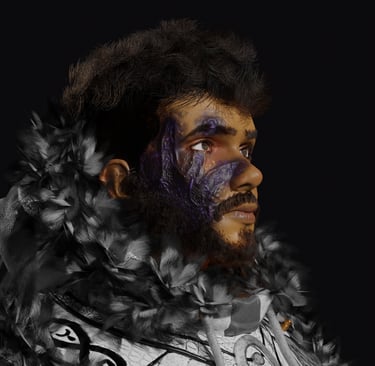
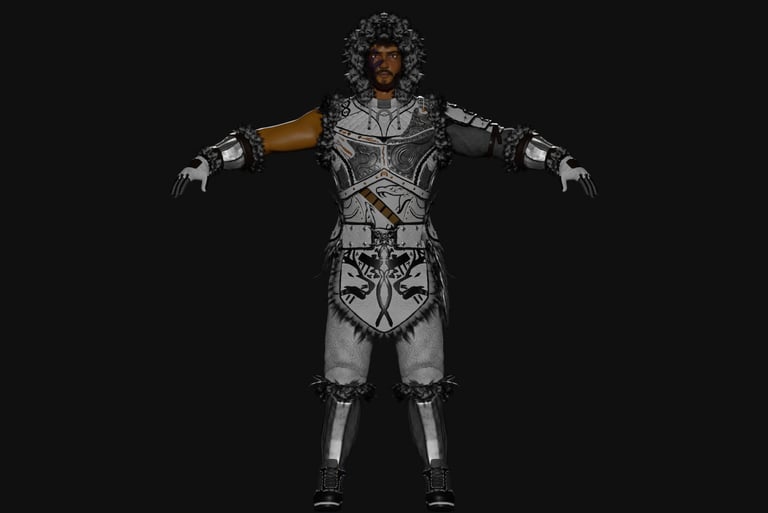
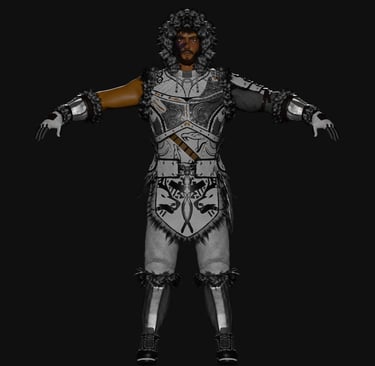
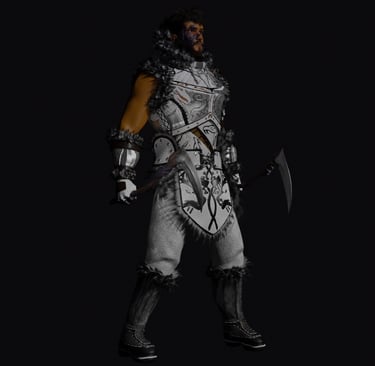
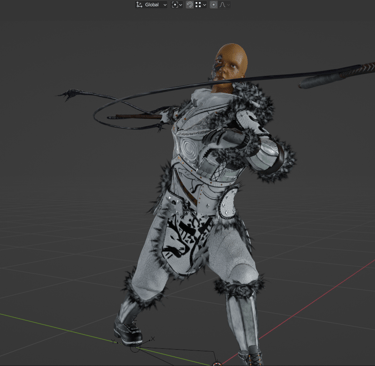
Erik
Main Character In Epic Journey
Played and voiced by Kay Bretas
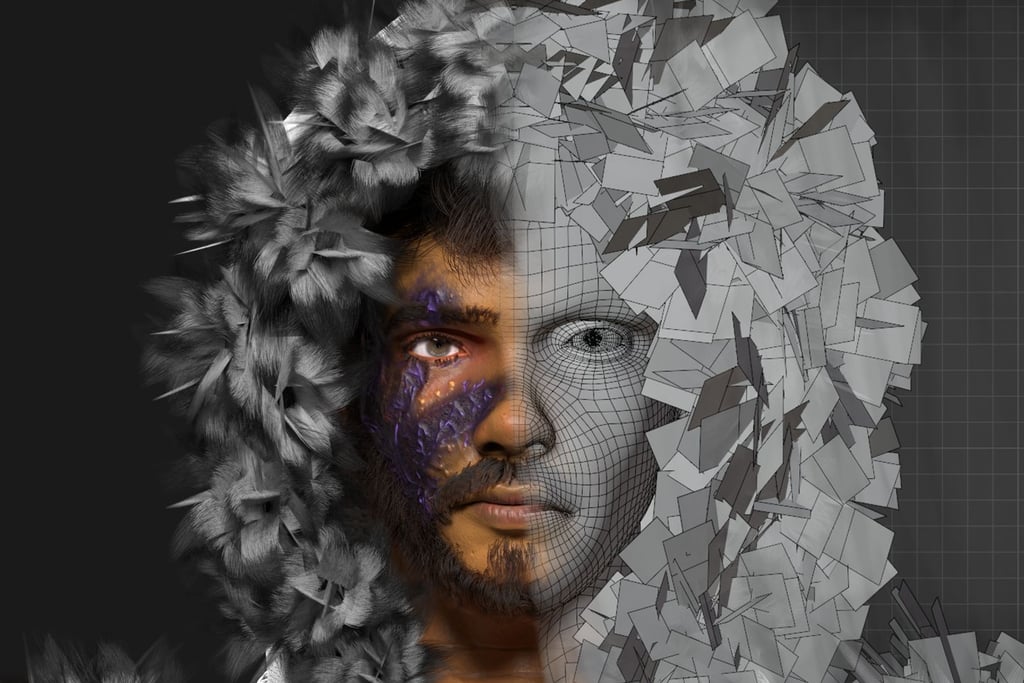
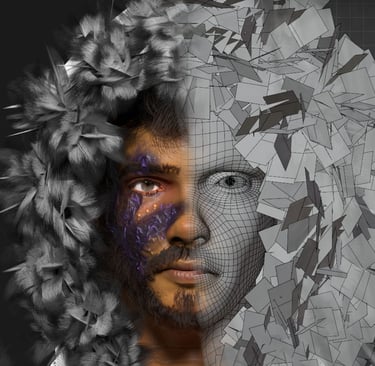
Erik's design will mirror the overall artstyle of the game
A mix of Semi-Realism and Stylized Artwork

Making of Erik


Epic Journey: Combat Prototype
Combat Prototype will be the prototype version of the combat system of Epic Journey: Nightmares and it will be release in the following months of 2026 on Steam for only 2$
A Deeper Look Into Erik
1 - Artstyle
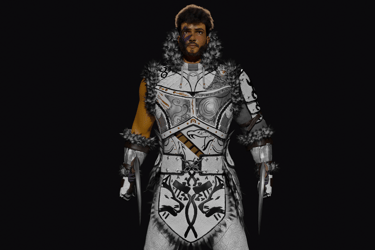
With our main character, the goal was to create a parallel between Semi-Realism a completely stylized artwork.
Semi-Realism is especially reflected in the face of the character and also in the animations (the way he fights, walks and his general body movement)
The stylized touch is reflected in his body, and will be reflected in the world around him.
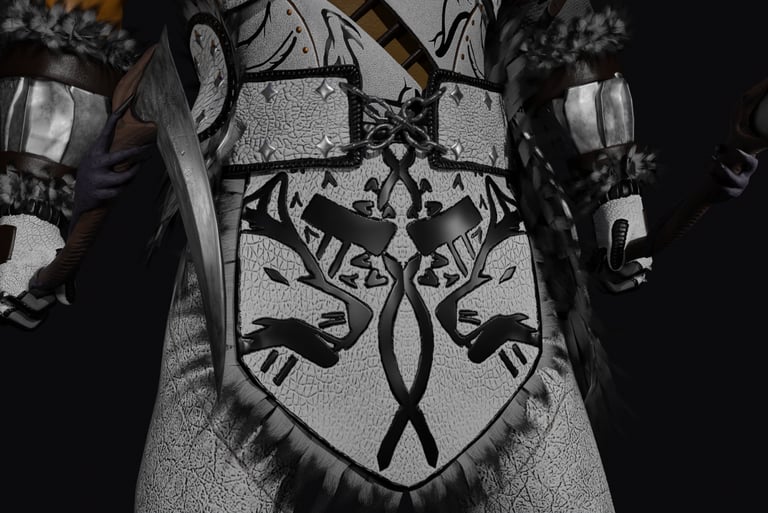
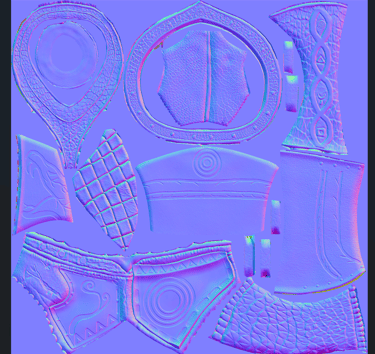
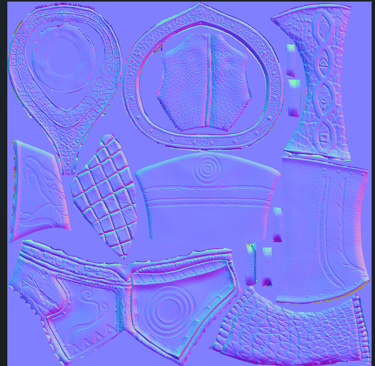
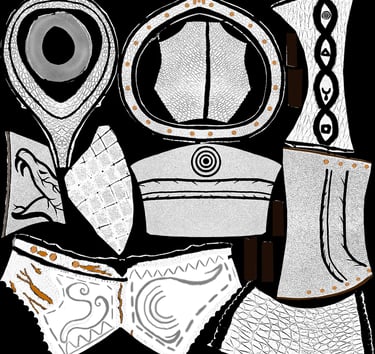
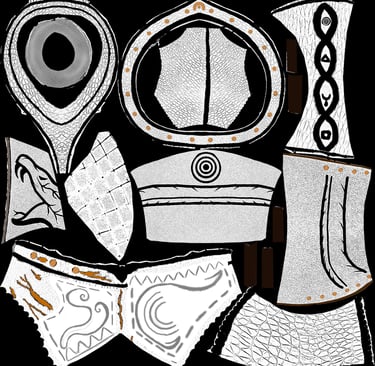
Every piece of cloth, armor, weapon the he carries is hand sculpted and hand textured. Procedural textures have been applied only to metallic parts and some leather pieces.
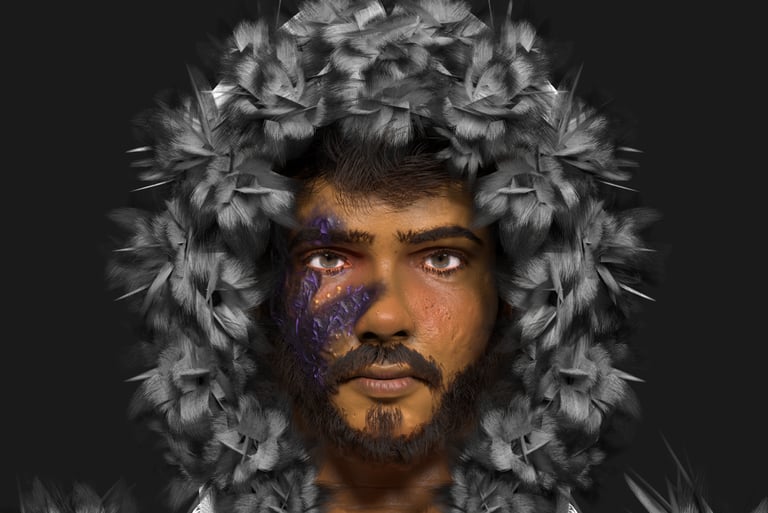
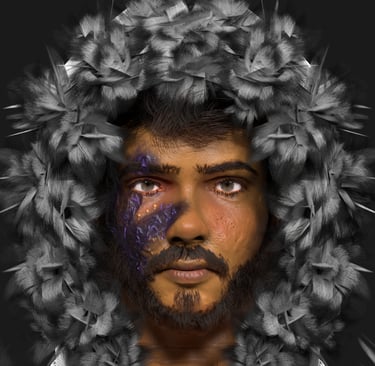
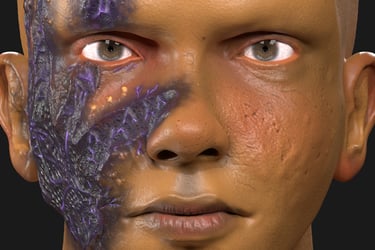
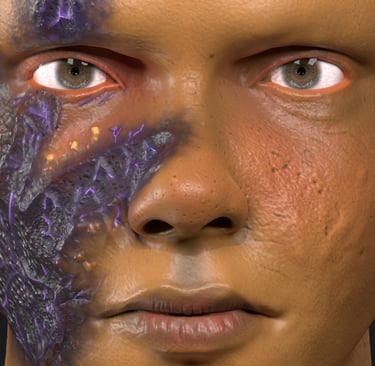
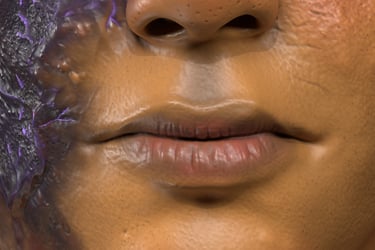
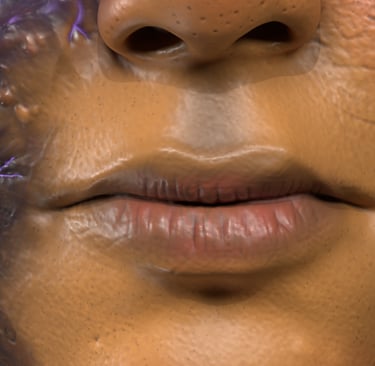
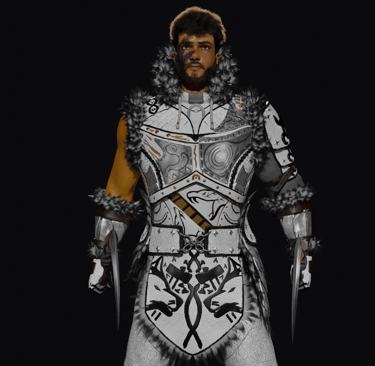
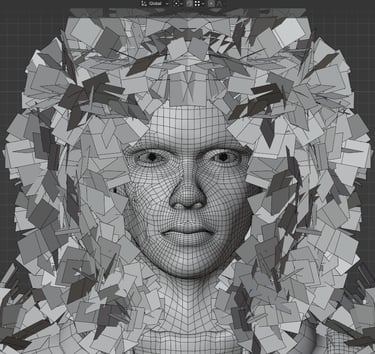
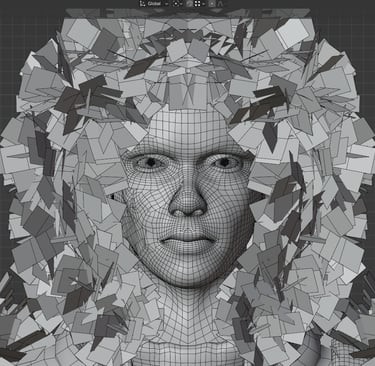
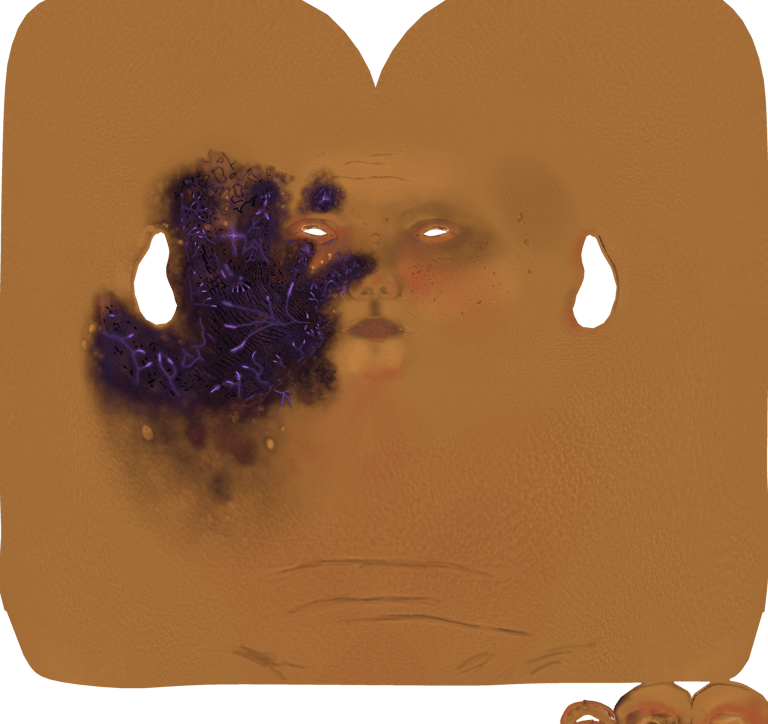
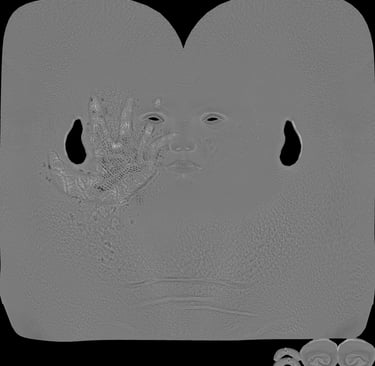
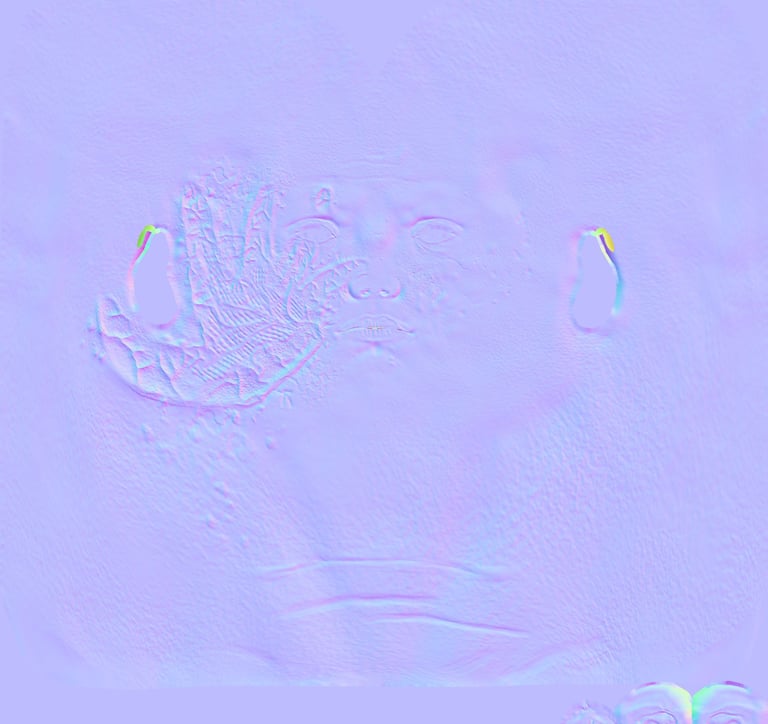
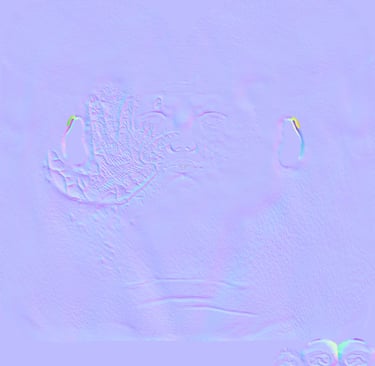
The face is also entirely hand scupted and textured as you can see in the timelapse, but the main difference between the face and the body is intention.
There are no stylized touches in the face, (apart from some random brush strokes on the neck) but the obvious touch that stands out is the mark of the hand, but on the other side, the body is full of cartoonish, a little exaggerated touches to make it clearly recognizable.
But essentially, the goal is to make the whole game a huge sculpture/painting.
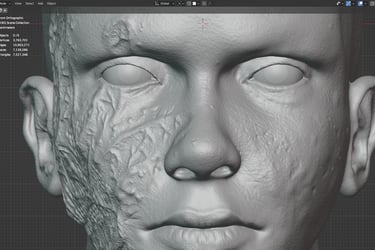
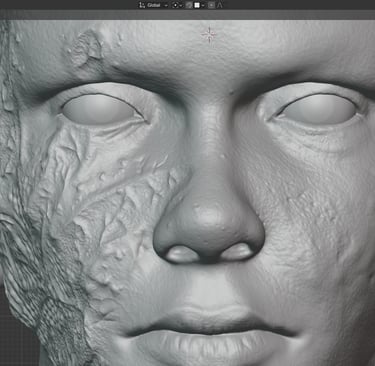
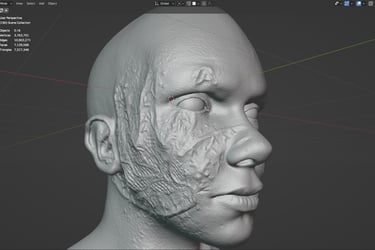
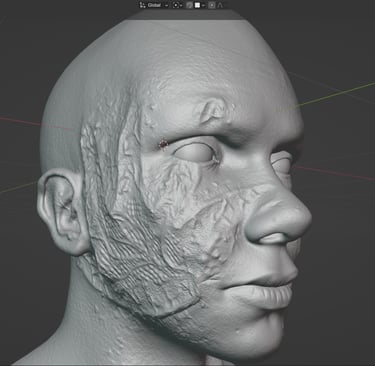
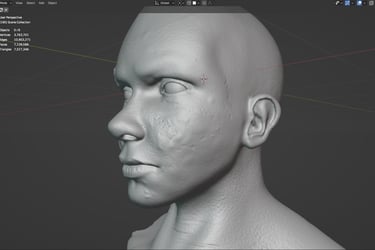
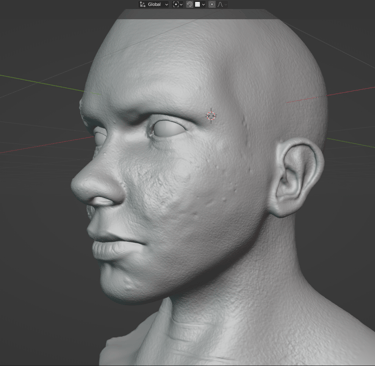
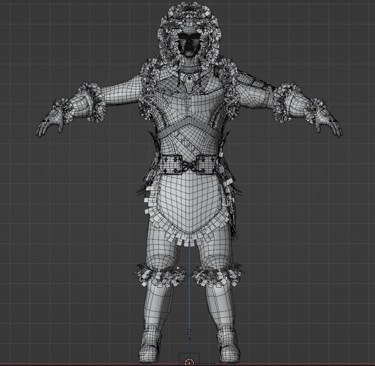
High Poly Mesh
Took 3-4 hours of work
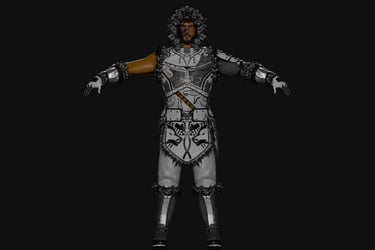
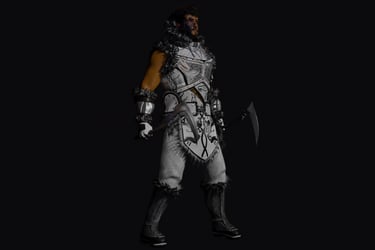
Low Poly mesh
Many days of work
This model will be used in Combat Prototype but it's not the definitive version since it has some technical issues
___ ___ ___ ___ ___ ___ ___ ___ ___ ___ ___ ___ ___ ___ ___ ___ ___ ___ ___ ___
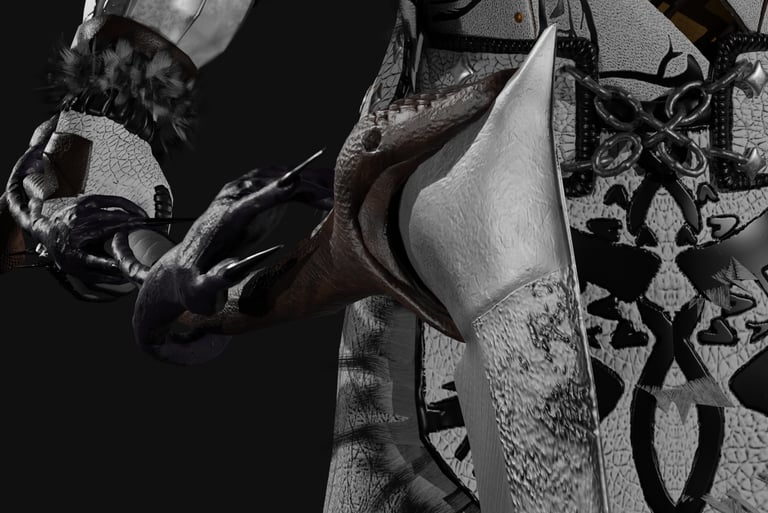
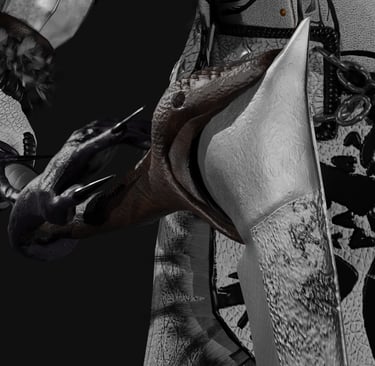

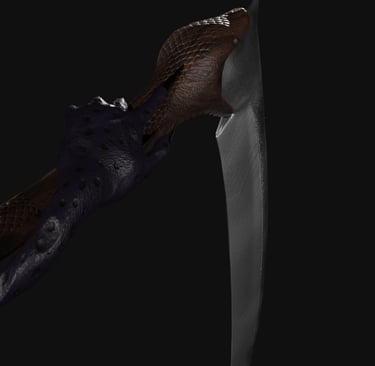
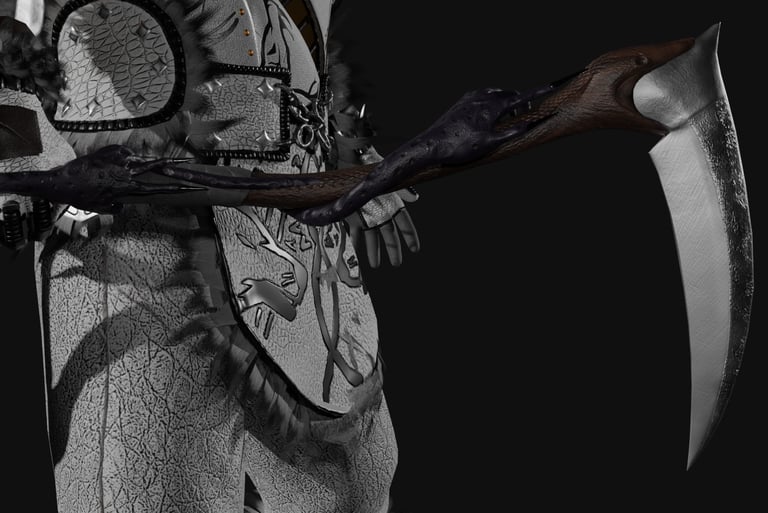
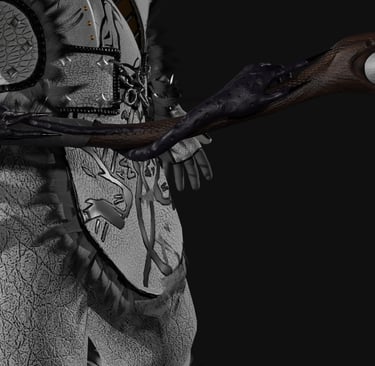
Yatana
Double Headed Scythe
Main Weapon in Epic Journey
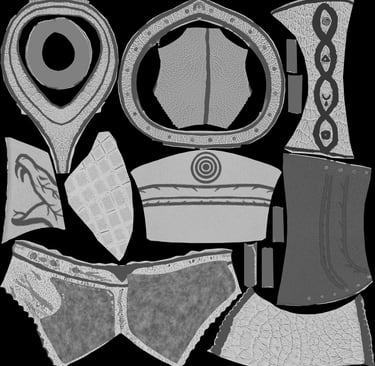
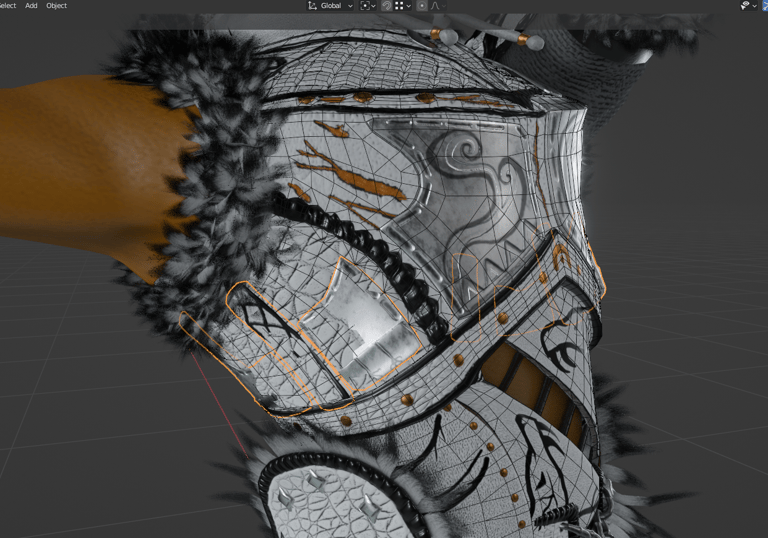
2 - Retopology and Textures


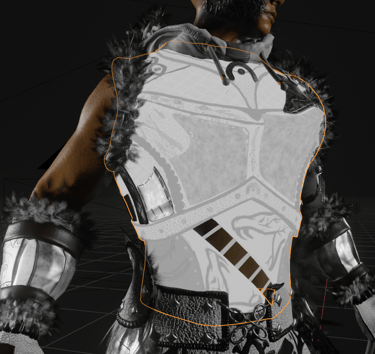
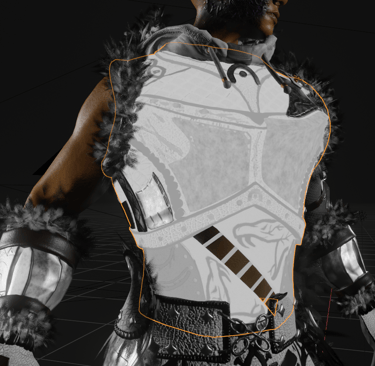
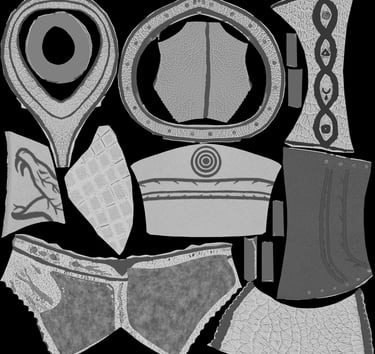
Erik is around 42.000 faces or 80.000 triangles
Optimizing Epic Journey and allowing it to run in lower end pcs is a top priority.
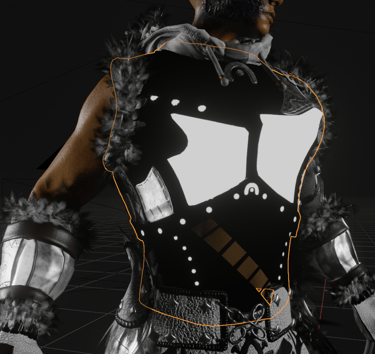
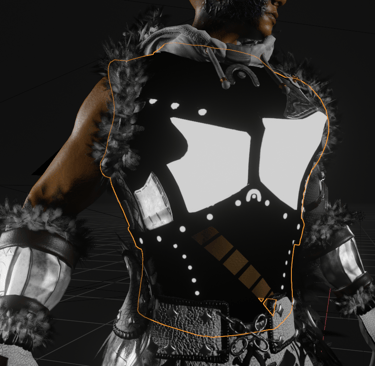
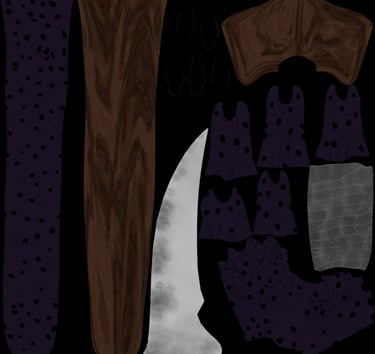
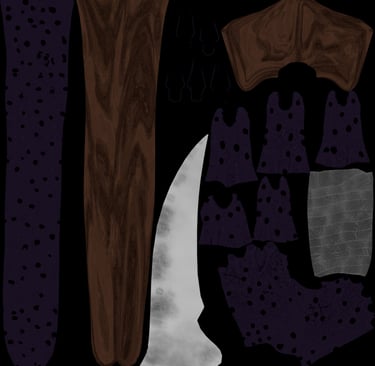
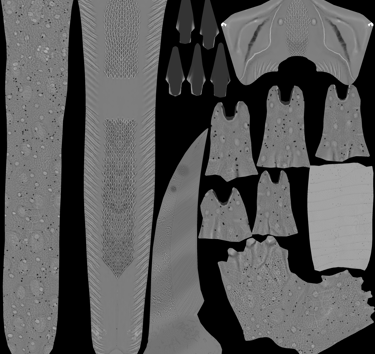
So for optimization purposes and since the overall artstyle of the game is going to be stylized, the main textures I decided to work with were Color, Metallic, Roughness and Normals, these being the most commonly used.
All parts were baked by distance exept for some metallics and roughness pieces.
All textures are 4k Resolution making it easy to reduce its size if needed.
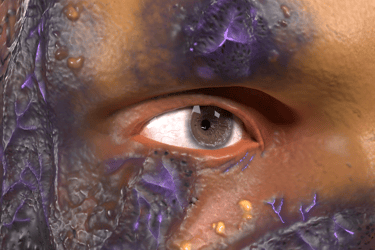
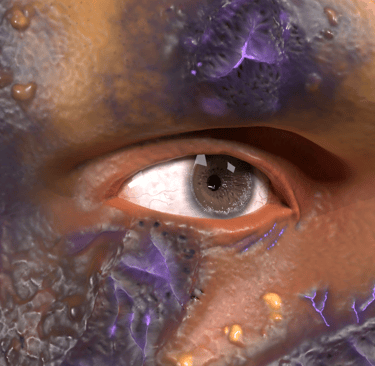
Color Metallic Roughness Normals
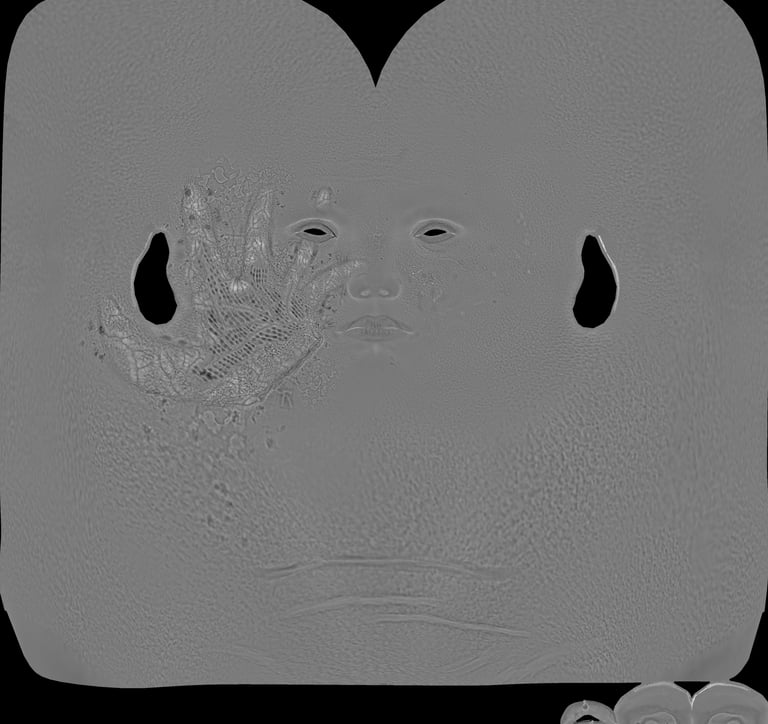
Face Textures

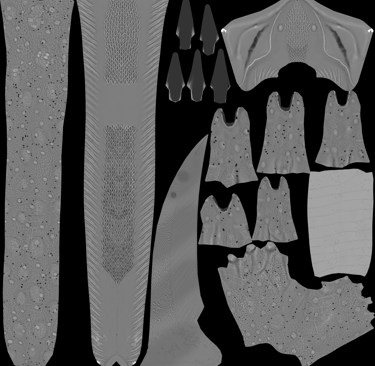
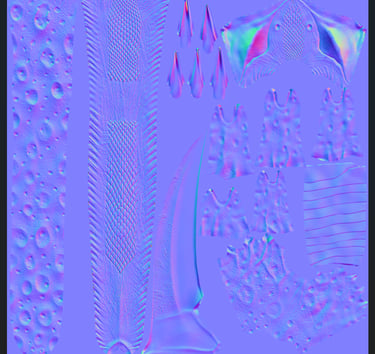
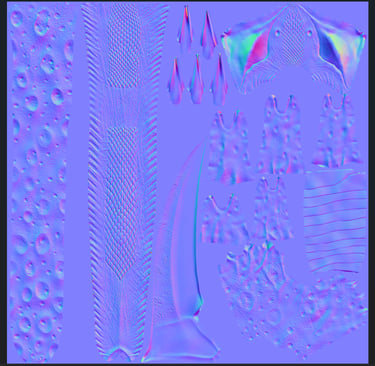
Yatana Textures
Technical mistakes
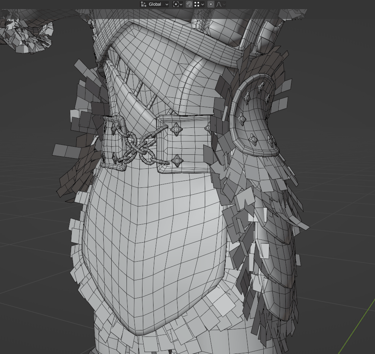
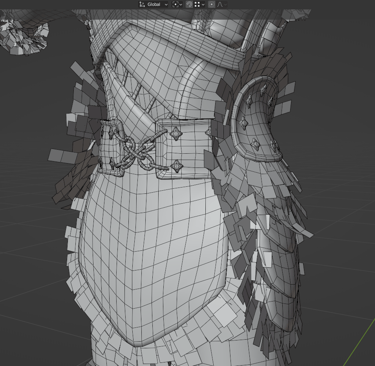
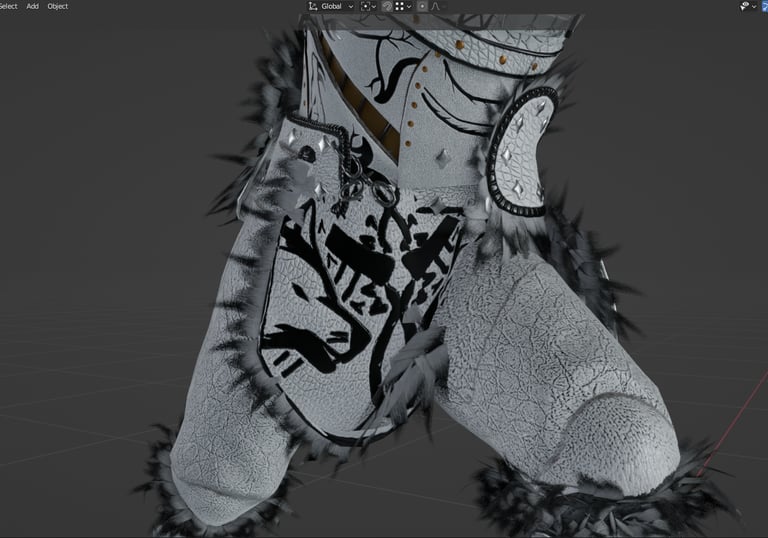
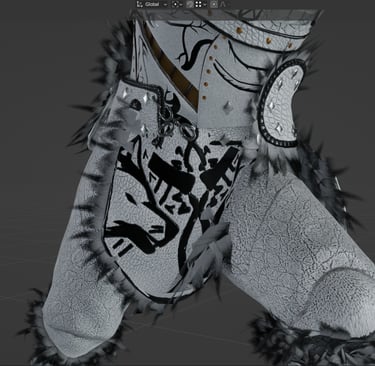
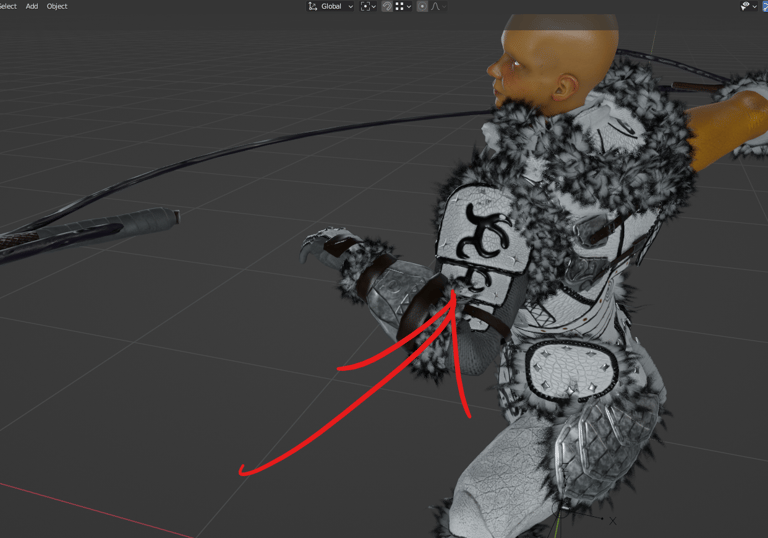
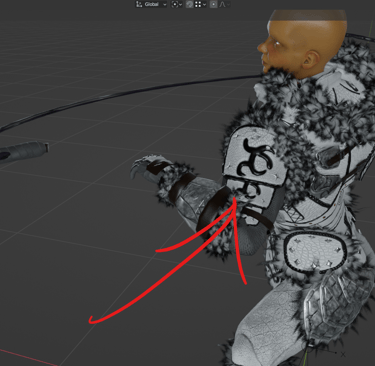
The waist is troublesome part to rig, animate and make the deformation look natural whenever the torso or the legs are moving, specially if the character carries a lot of clothes on that zone.
There is really no technical fix for that, is just a matter of design, how and where the creator positions geometry, and of course, wheight distribution.
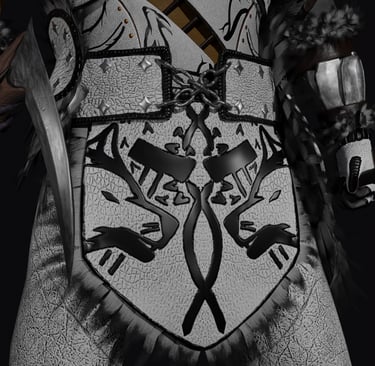
In Erik's case, his waist carries both a small waist belt and a cape.
Both the cape and the waist belt easily intersect with the rest of the body when moving, which is a hard problem to fix without adding more bones or complex rigging mechanisms.
So the i decided that the real fix for this problem is going to be to completely redesign his waist area, create a bigger waist belt that covers a larger area in his abdomen so it does not intersect so easily with other parts of the body.
The cape could also be redesigned.
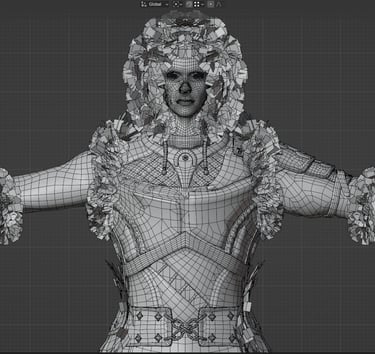
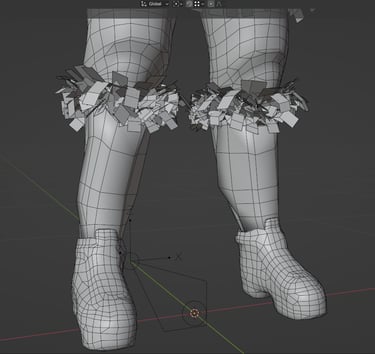
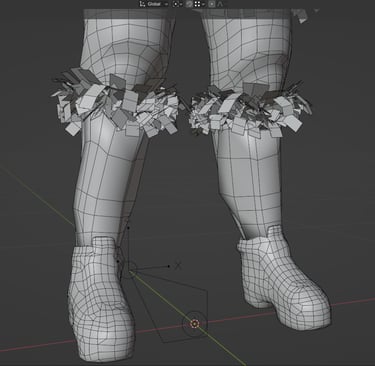
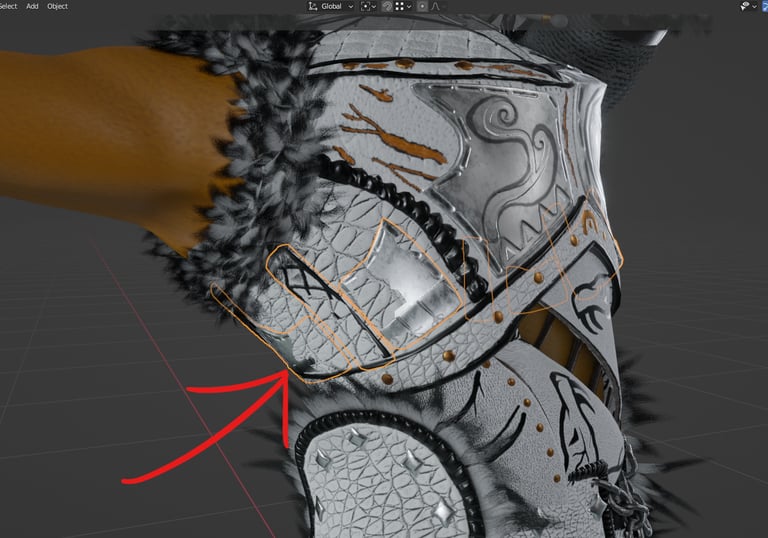
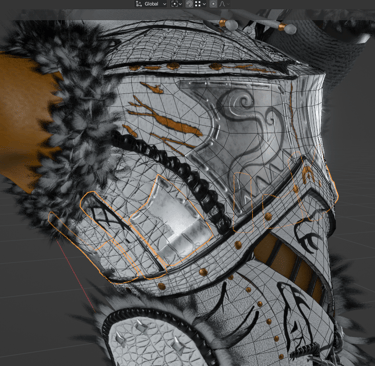
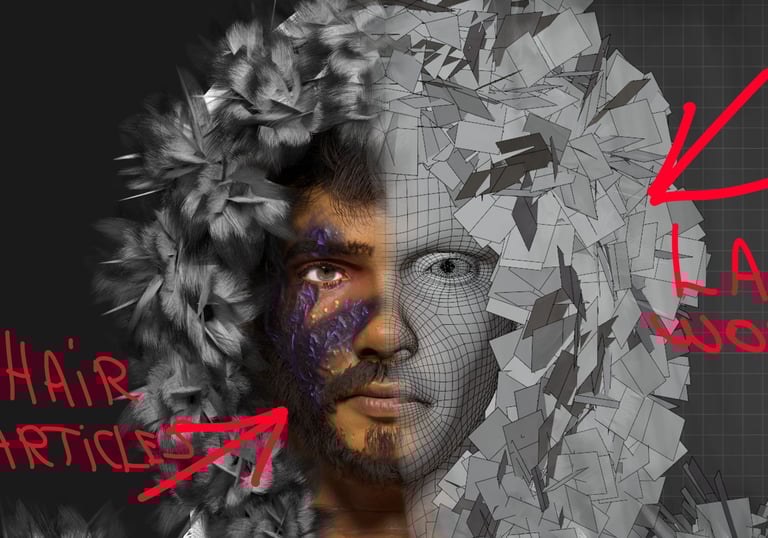
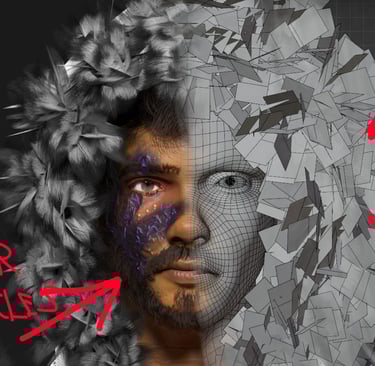
Another noticeble issue is the fur, hair and beard.
There is nothing technically wrong with the fur around his armor, it's just badly designed.
Lazy hair cards placed randomly.
The hair and the beard are made with particles, for demonstration purposes. Not game-compatible.
Both of these issues will be fixed before the launch of Epic Journey: Combat Prototype.
3 - Rigging
4 - Animation
Rigging characters for animation has become one of my favorite parts of the process.
But after months of testing all types of mechanisms like foot rolls, forearm twists, drivers, bone sliding... I found that for game devs, specially indie game devs, the best and quickest way to go is with the simple IK/FK mechanisms.
And the reason for that is, exporting your rigs and animations to game engines like Unreal or Unity can come with a series of problems that one will learn only by experience.
In my experience with rigging and animating in Blender and than exporting to Unreal Engine 5, I notice that the way Unreal interprets things like bone relatioships, animation frames and scale, are very different from the way Blender does it. And that leads to your animations playing differently on Unreal compared to Blender, and sometimes, with more complex mechanisms involving drivers and Bone Sliding, the Rig simply breaks.
So instead of waisting years of my life trying to figure out all the tricks of the Unreal Engine and Blender, my final conclusion is to just animate my characters with simple IK, FK and floating bones.
And In my experience, there is nothing these simple mechanics cannot achieve, unless you are going for HyperRealism, which I personally am not.
Here is a quick breakdown of Erik's Rig
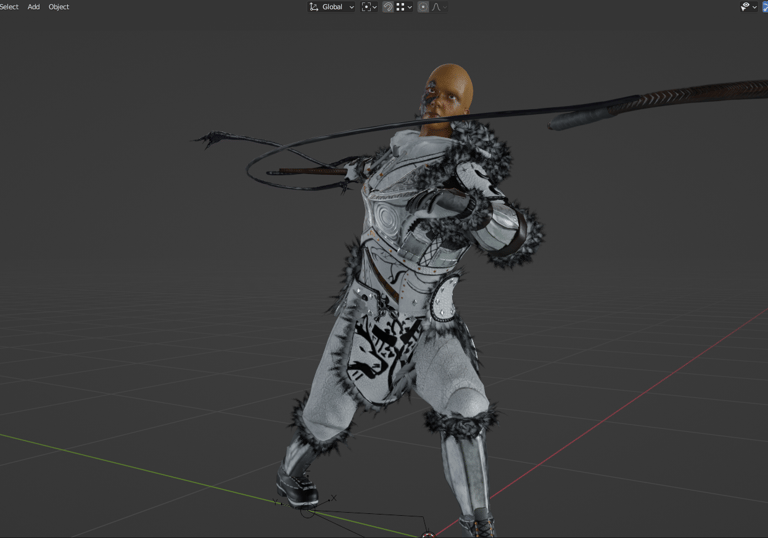
Although Epic Journey is a Indie project and not going for HyperRealism, animation is being approached with a realistic touch.
Meaning that the way Erik walks, runs, stands, fights, jumps, falls... will all be portraid in a human way as opposed to a "Superheroish" way.
Specially in the way he fights, although the Yatana is not precisely a combat viable weapon in real life, all movements will be designed accurately according to the mechanics of the human body.
I do not follow any workflow when animating my characters.
Every animation is a different world.
Sometimes I start by blocking out the main frames of the animation and then making all the necessary little adjustments.
And sometimes I animate by phases, meaning if I am working on a attack animation that has 3 phases, Charge, Attack and Recover, I will first animate the whole of the charge, than the attack, then ill set up the recovery phase in a way that blends naturally with the next possible attack animation.
Or... better yet... just do the d*mn job until it looks good...
Thats my favorite workflow... for everything I do.
I also do not work with the Graph Editor in Blender. I find it way to "fancy" for my taste, besides, as said before, Unreal interprets frames differently from Blender, so whatever work you do with the graph editor may be overwritten when exporting.
And simple keyframing animation has not disapointed me until now. So I will keep using it until proven wrong.
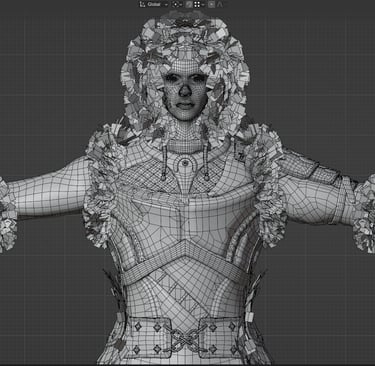
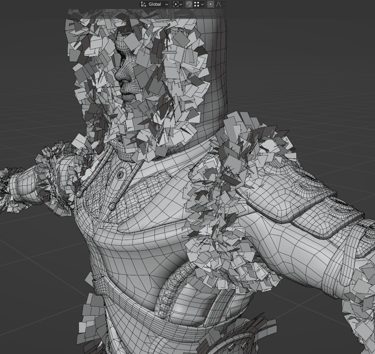
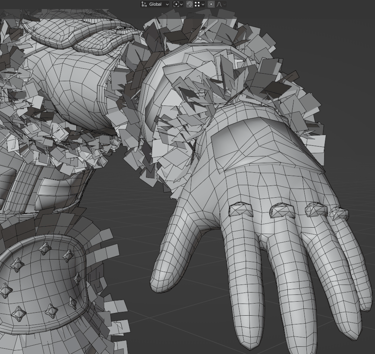
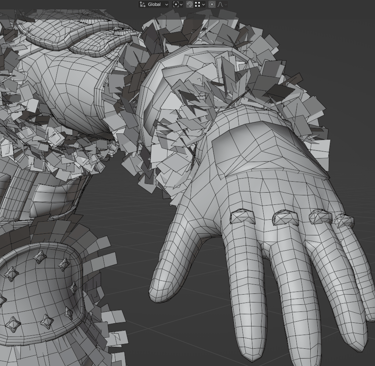
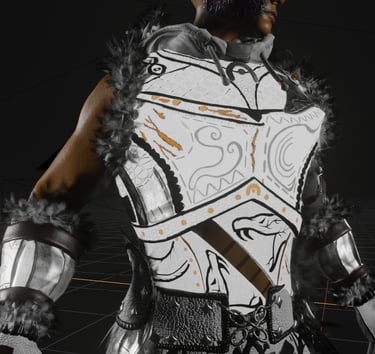
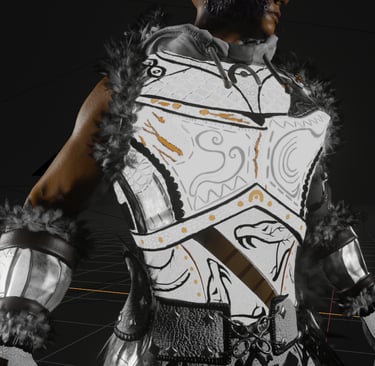
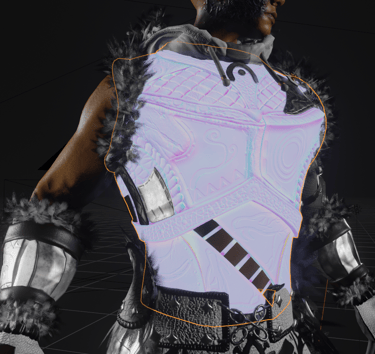
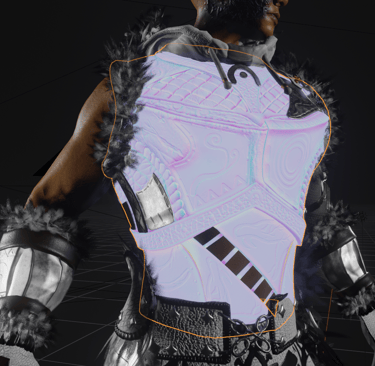
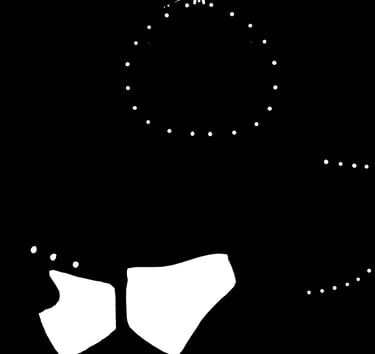
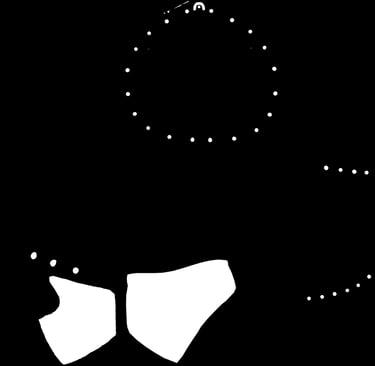
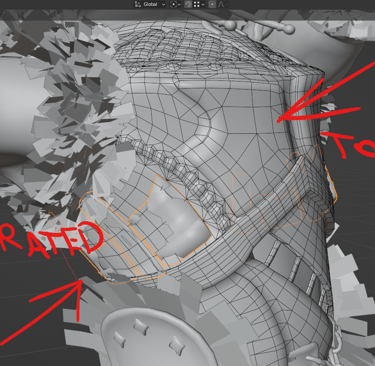
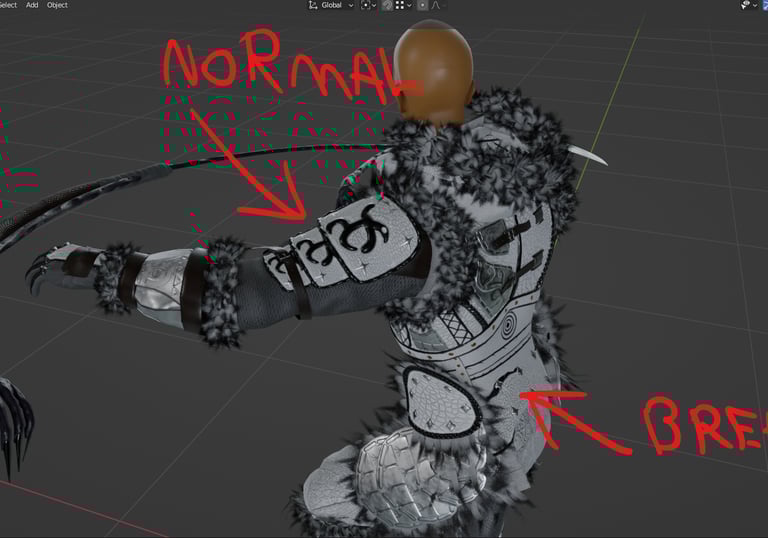
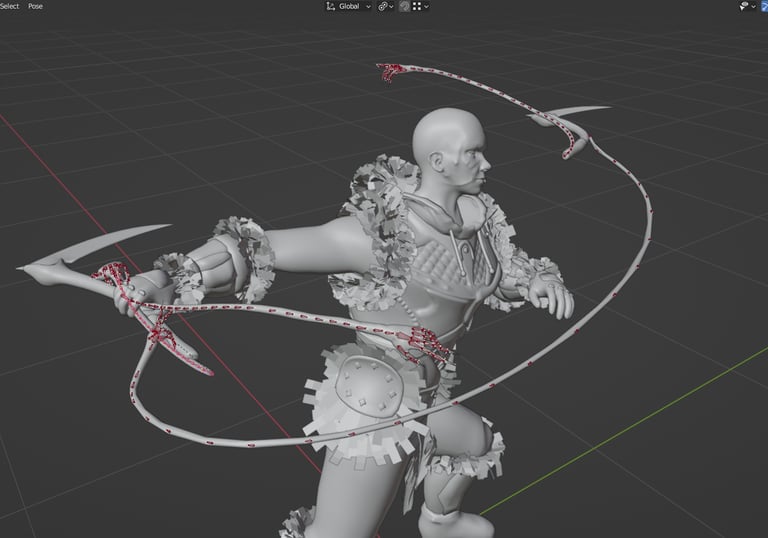
The major issue this character has it's that some parts are separated.
Standing in a T-Pose, all is normal and looks good, but as soon as the torso begins to rotate, all the separated parts will move according to the bones to which their wheight is paired, so esentially, they just start floting...
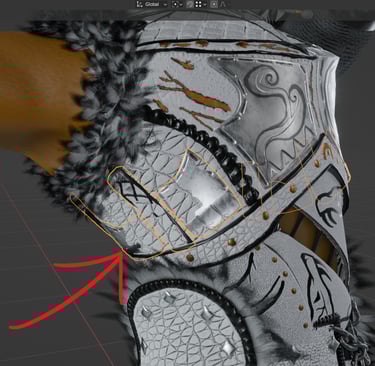
Separated parts when the character is standing As soon as the torso begins to rotate
Overlaping and floating
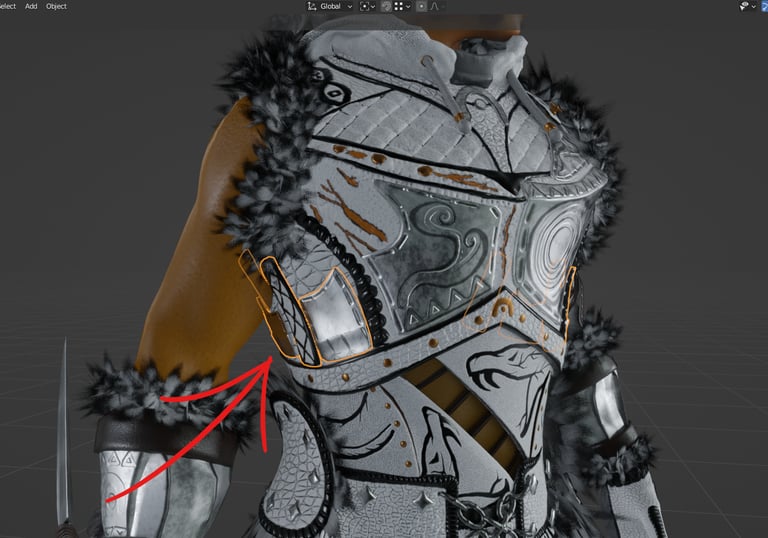
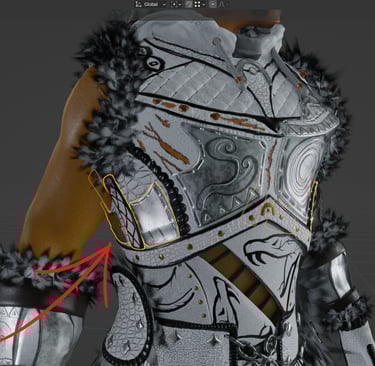
Normal position
Although I think this issue could be fixed with some wheight ajustments or adding some extra bones, in my experience, it is never fixed 100% and adding more bones just over complicates the Rig and makes the archive havier in size.
So the real fix in my opinion, is just to retopologize all parts, or the majority of parts of the character as one.
It may complicate the baking process but rigging, wheight painting and animation will become much more simple and effective.
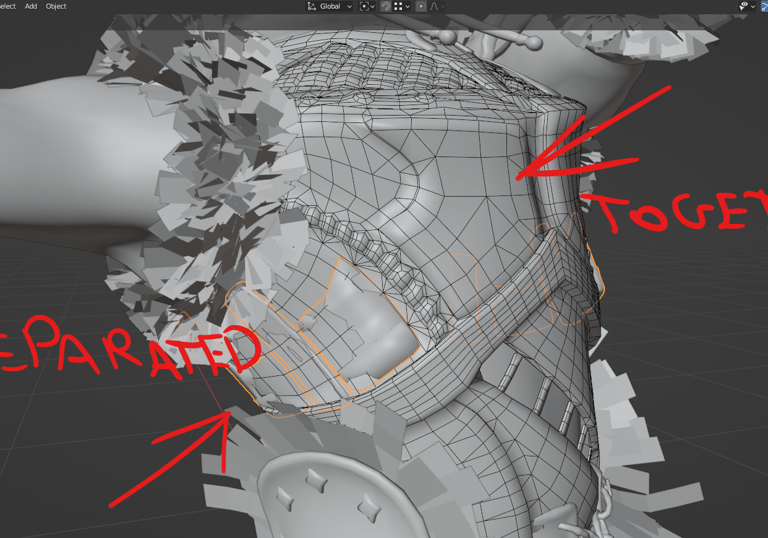
If the mesh is retopologized as 1 big part, it's more likely to deform correctly when moving.
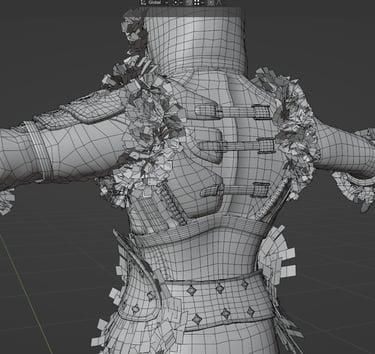
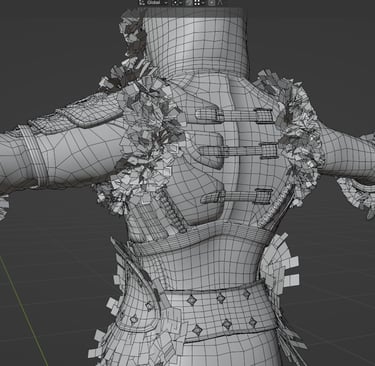
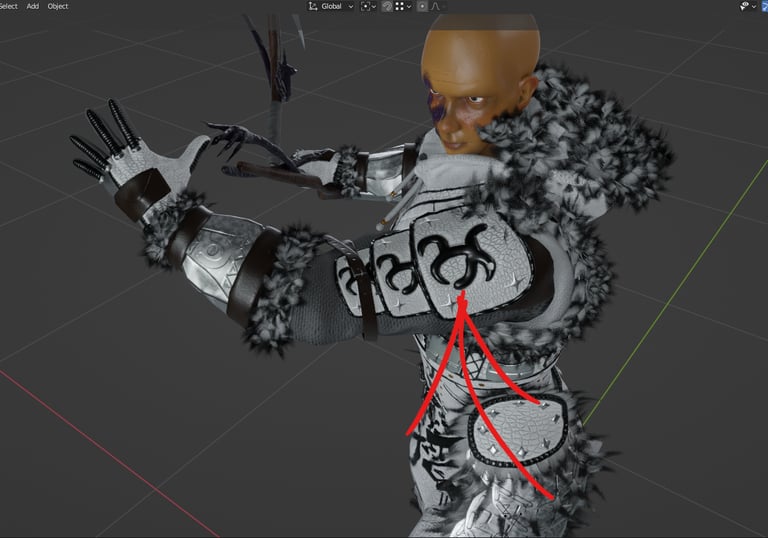
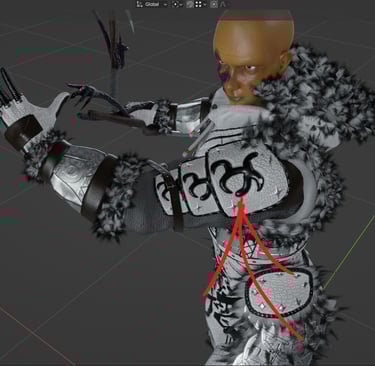
The second issue is the waist zone.

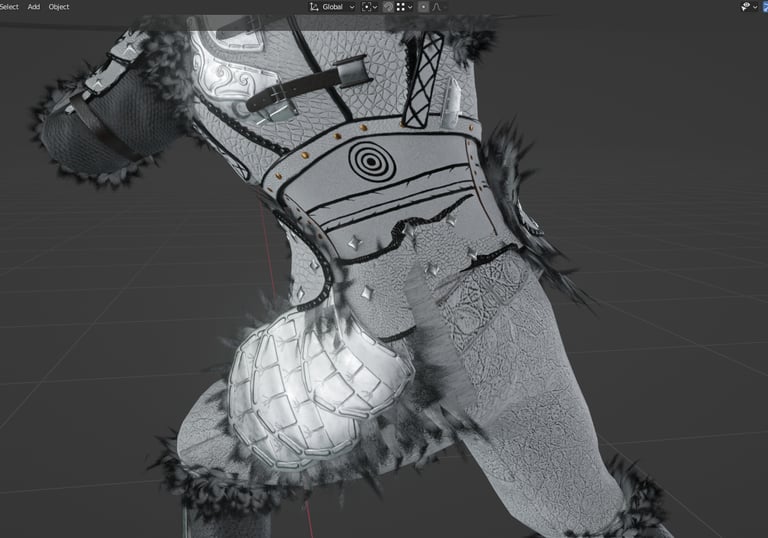
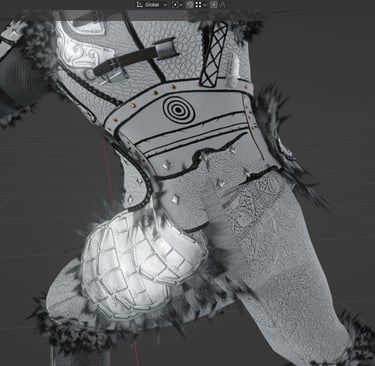
Waist breaking when rotating
Same frame

Just like the waist belt, the shoulder is a separated part but it does not break in any movement.

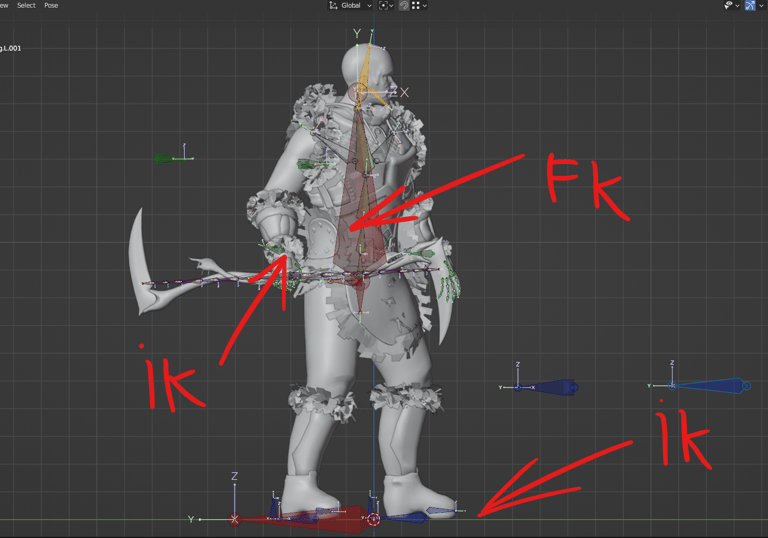
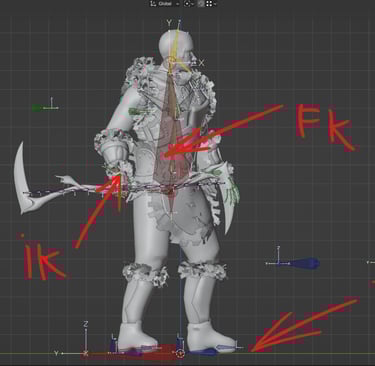
I did not even bother to build an FK mechanism for the arms and legs. For that part of the body, IK feels way more natural in any movement.

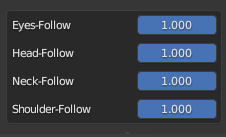
I've also took the time to build Follow mechanisms, to switch between following the movement of the torso or not.
After so many hours of animation, I still find no use for these things.
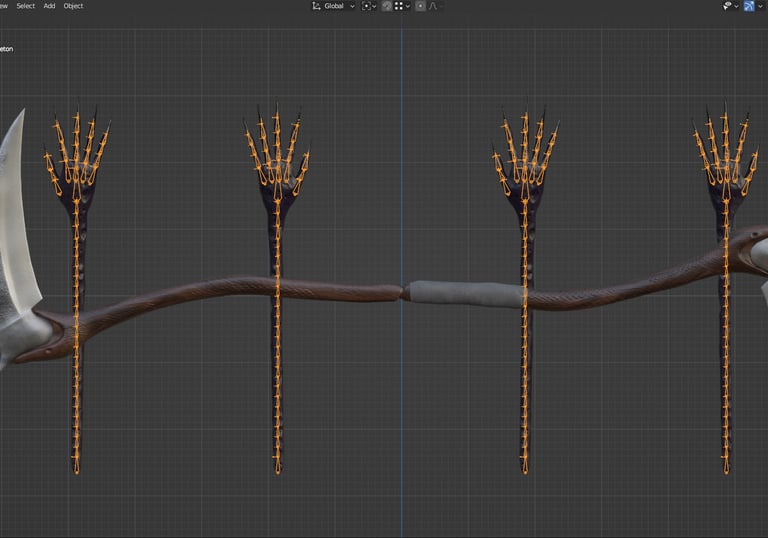
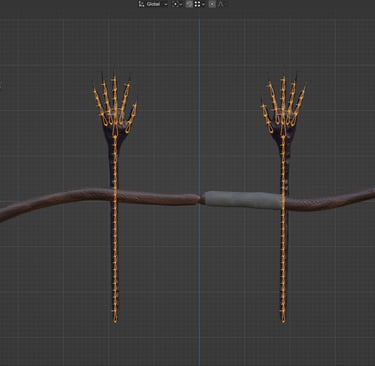
The only place in this whole rig where I wish I had a more complex mechanism is on the Whispering Hands.

I've tested a Bone Sliding mechanism months ago. Works wonderfully and it's very easy to animate these kind of things with it. the only problem is that, for some reason... Unreal does not like it.
But as you can see in this frame, FK still look good, it's just a slow process to animate with it
So my final take on rigging is...
Don't over complicate yourself
The simplest rig will do the job for the most part
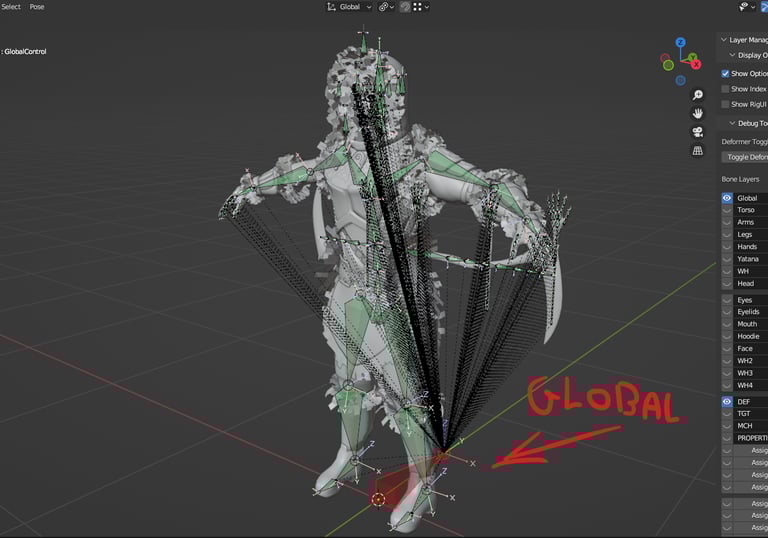
My favorite rigging technique is:
1- Constrain every single Deformation bone to a Target bone in the same location.
2- Instead of using the Deformation layer as the base of your rig, use the Target layer and build all your mechanisms above it.
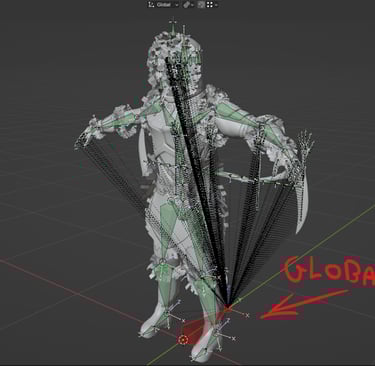
3- Parent every single Deformation bone to the Global Control.
4- Export your Rig using the "Only Deform Bones" option.
5- Enjoy perfectly exported animations without bugs.
In my experience it's the best way to avoid bugs while exporting your rigs into Unreal Engine.
Here are some of the animations I've made for the game.
Thanks for reading.
I will update this Blog days before the release of Combat Prototype
I'm sure You will Love Epic Journey

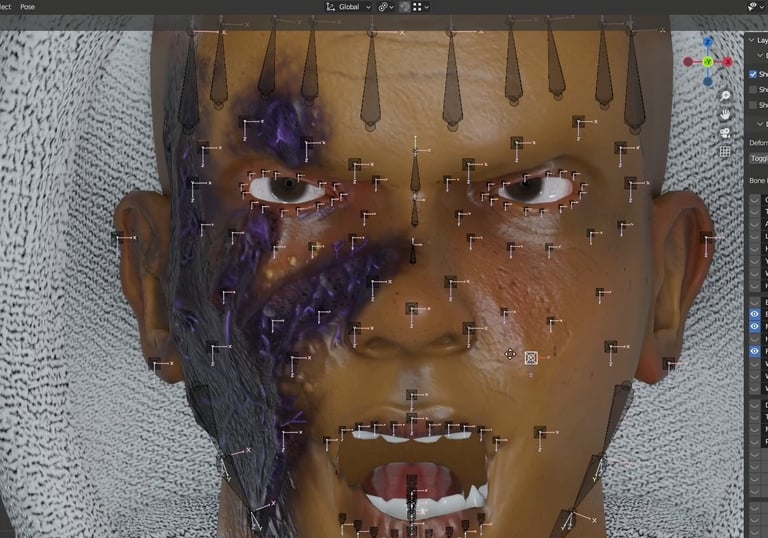
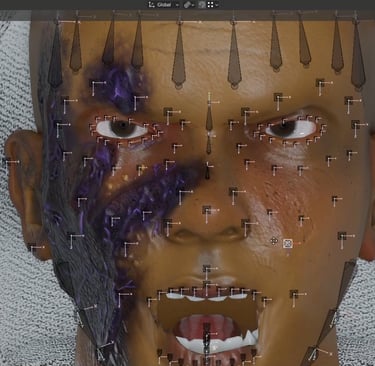
Face Rig is entirely built with floating bones. Nothing else
___ ___ ___ ___ ___ ___ ___ ___ ___ ___ ___ ___ ___ ___ ___ ___ ___ ___ ___ ___
___ ___ ___ ___ ___ ___ ___ ___ ___ ___ ___ ___ ___ ___ ___ ___ ___ ___ ___ ___
___ ___ ___ ___ ___ ___ ___ ___ ___ ___ ___ ___ ___ ___ ___ ___ ___ ___ ___ ___